Page 2 of 2
With that in mind, a camera should generally have these functions available:
- Image Size: Allow you to choose the size of the image you want, from lower megapixels to the maximum megapixel of the camera. Useful if you don't need full size prints and only need smaller images to quickly post onto social media such as Facebook or Instagram, etc. This also reduces the amount of space that the image will take, allowing you to take more images, and also clear out the buffer quicker.
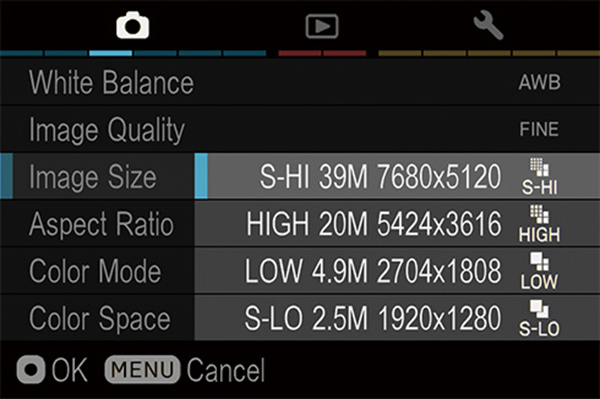
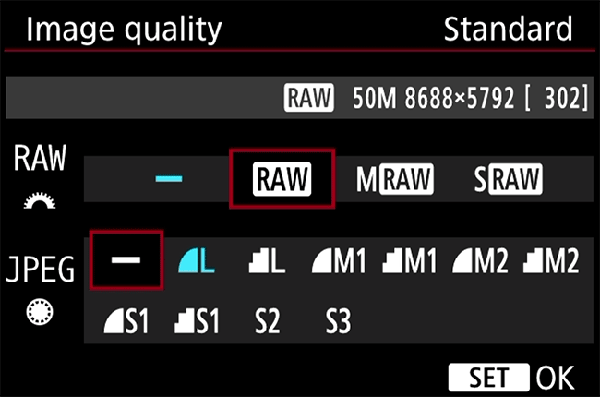
- JPEG/Image Quality: Other than the size of your image, you can also choose the quality of it. Choosing a lower quality will help save space and allow you to take more images.
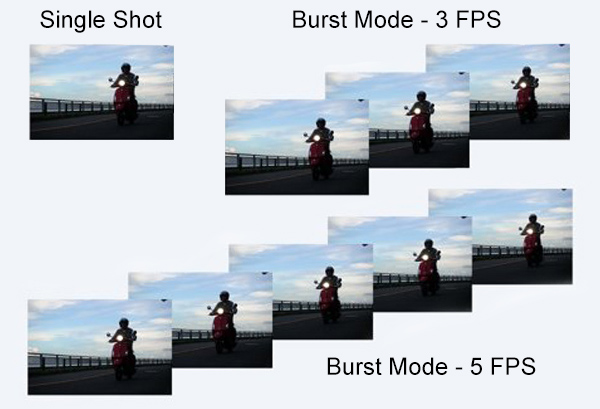
- Burst Mode: Set whether you take one image at a time, or burst shots. Usually allows you to select the speed at which the images are taken.
- Bracketing: When using bracketing, you can set the exposure difference to which you want to capture the images. For example, you can set the camera to take 3 bracketed shots at 0.3EV (0.3 stops) differences apart, or 3 bracketed shots at 1EV (1 stop) apart.
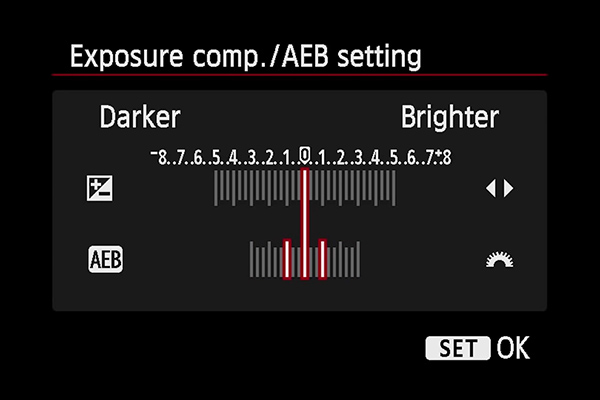
- Exposure Value: This allows you to make the image you're about to take brighter or darker. Once you've set it to the exposure you want, if you need it to go brighter, you can set this to overexpose by how many stops you want and the camera will automatically change other settings to meet your requirements, and vice versa if you want it darker. Depending on the camera, there'll either be a dial for you to change, or a button for you to access, and then pick the exposure you want to change to.
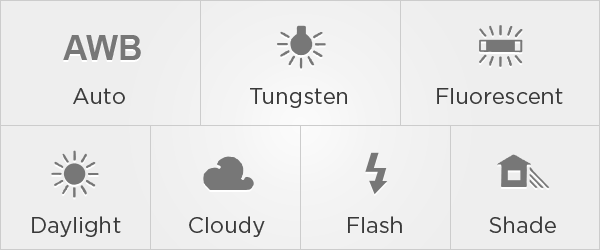
- White Balance: Pick the white balance you'd like to use, or leave it on auto.
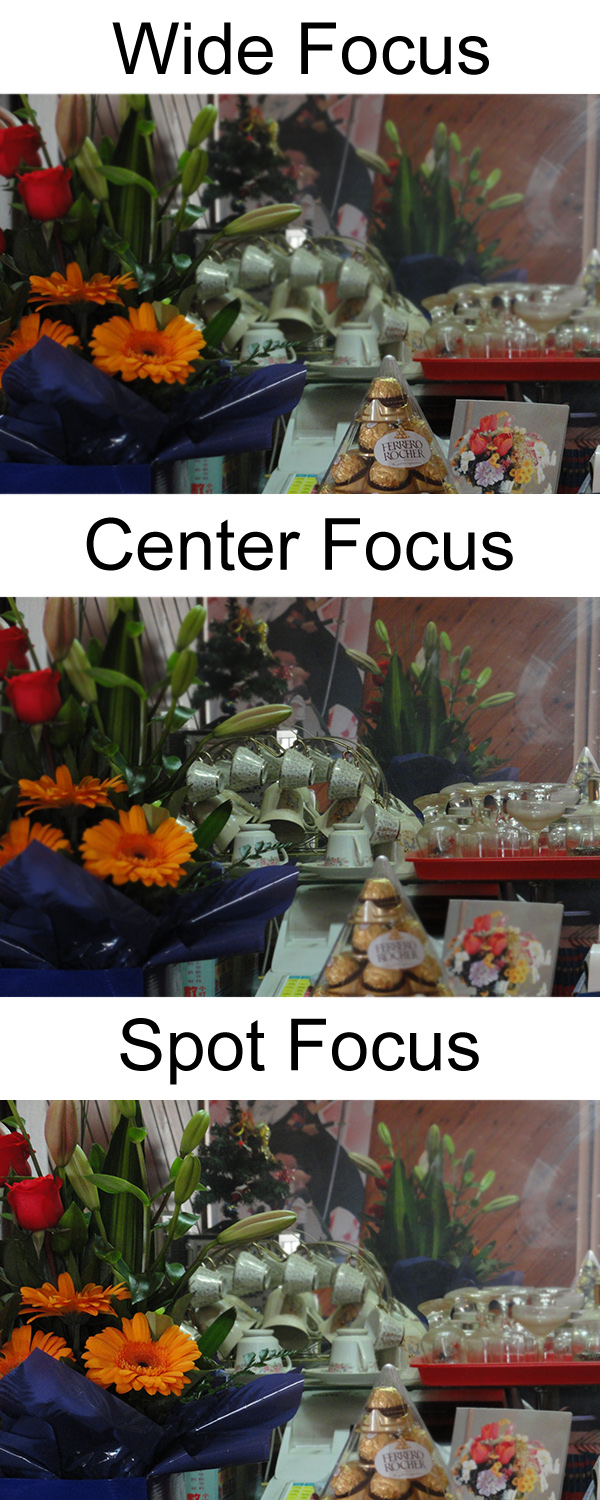
- Focus Mode: Choose the way your camera focuses. Typical methods are wide, center, and spot. Wide will use all of the focus points available on your camera and focus on the closest object, center will use the middle, and spot will allow you to pick one of the focus points to use. In this example, wide focuses on the Ferrero Rocher as it was closest, center focused on the tea set, and spot allowed me to choose the flowers on the left.
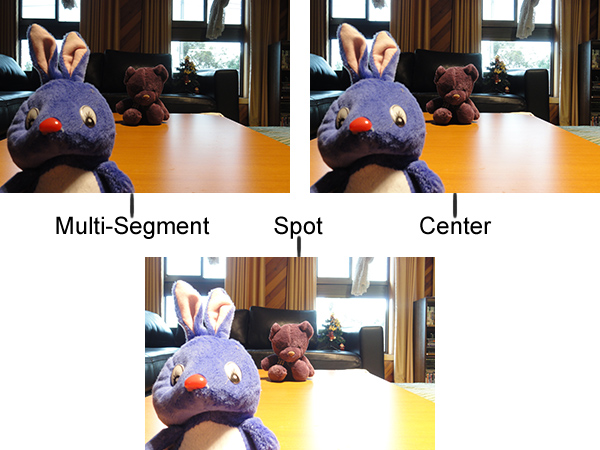
- Metering Mode: Choose how your camera will decide on the correct exposure. There's typically multi-segment, center, and spot metering. Multi will use the whole scene to decide how to correctly expose the image, whilst centre will do the same, but put more emphasis on what's in the middle. Spot will only use the middle, or on some cameras, a point that you set it on. The camera will meter the scene, using the mode you use, and adjust settings so that the scene then has what it thinks is the correct exposure. Multi and center generally have similar outcomes, but notice in this case that because the center is on the darker side of things, the camera thinks that more of the scene is underexposed, thus the resulting image gets overexposed a little. So vice versa, if the center was on the brighter side of things, the camera will underexpose a little. Spot is useful once you know how to use it because when the scene has all sorts of highlights and shadows and the camera isn't able to determine a good balance between the highlights and shadows, you can find the middle gray, ie. the shade that's approximately in between the highlight and shadow, so it'll expose to a medium. Here we just used the dark purple bear and because its dark, the entire scene is metered as underexposed, even though there highlights in the windows, to which then the camera exposed for the darker bear, overexposing everything, and blew out the highlights.
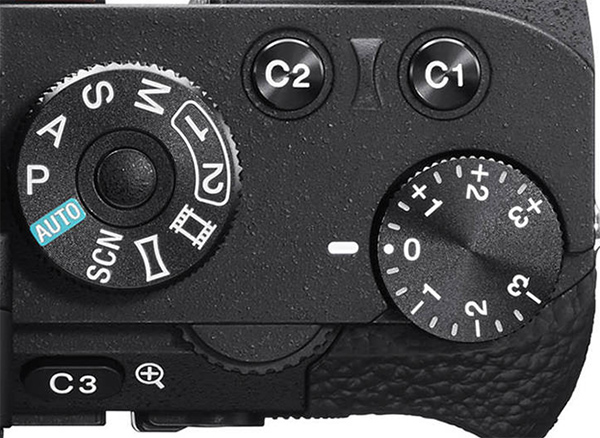
Finally, there are various modes which a camera has to make use of these functions.
- Automatic Mode: The camera does everything for you - just point and shoot. You'll still have the choice of whether to use flash or not.
- Scene Mode: You can choose a certain scene that you're in (given that it's available) so that the camera will adjust its settings appropriately for that scene.

- Program Auto, or Sensitivity Priority/ISO Value: The camera will automatically adjust the shutter speed and aperture, while you'll have more control over the camera, such as; ISO, focus, exposure settings, flash, white balance, metering, and bracketing, etc.
- Shutter Priority, or Time Value: The camera will automatically adjust the aperture and ISO (if set on auto) while you control the shutter speed and the above mentioned functions.
- Aperture Priority, or Aperture Value: The camera will automatically adjust the shutter speed and ISO (if set on auto) while you control the aperture and the above mentioned functions.
- Manual Mode: Allow you to have full control over your camera.
Well, that's about it for the crash course. Hope you found it useful, and be sure to check back as I will soon have more tutorials on how to make use of the various functions.
Happy shooting.
